Monday, August 22, 2016

Angelic Inspiration by Linda Ann Smith

This $.25 thrift store find became an armature for . . . 
this Paverpol Angel!

Paverpol, Pavercotton, and Primary Elements were used to upscale the wire angel.

Click on the arrow in the video below to see how she was transformed!


Lacy wings
Front view
Back view


Wing detail........


Friday, August 19, 2016

Vernal Equinox Fairy

Vernal Equinox Fairy by Linda Ehrenfried
The day between Winter and Spring when the vale of winter is lifted and the magic of spring and all its colors takes over the landscape and bloom and birds sing.


Materials needed:


*Creative Paperclay
*Transparent Paverpol
*Woodbase with tall dowel
*Ziplock bag
*Wire Armature
*Aluminum foil
*Yard of white satin fabric
*Luminarte  Primary elements
   in assorted colors
*Synthetic or natural Hair
*White Embroidered lace
*Silk ribbon roses
Wings (Angelina film and wire) Not included in tutorial


First step is to cover your work surface with plastic as it is the only thing Paverpol does not stick to. I began with the wood base and dowel and added the armature attached to the top of the dowel through a hole drilled near the top. I wanted a dramatic look so there is an exaggerated length to this dress so the torso is for a smaller doll intentionally.


I sculpted the head and hands in Creative paperclay on wire and attached them to the armature which is connected to the top of wooden dowel and then I used masking tape to secure it. I used aluminum foil to build up the body shape and masking tape to cover it and prepare the surface for the paperclay layer so that it will not be to thick and take longer to dry. Next I covered the entire armature with Creative Palerpaperclay and sculpted it into a dress form that will make the dress look natural on the doll when I add the Paverpol coated fabric later.


The next image is the fabric. Cut the yard of fabric into a circle. Try to use all of the yard.  Then find the center point and let all the fabric hang from that center point and cut off the tip this is where the large circle will go around the waist of the doll. Cut a slit to give you enough room if needed.

At this point while the body dries, I went ahead and cut the fabric (see below) and dry fit it on the doll for size to make sure there is enough to drape it the way I want.  I am looking for fluid movement so that the dress looks like it would on a twirling ball room dancers skirt. 
The slice will let it go over the base. I used a rubber band to hold the center  of the circle so I could keep the fabric gathered from the center out. Next You need your transparent Paverpol and the Ziplock bag

Next picture is the finished torso with its Creative Paperclay layer applied, sculpted and now dry. Note the shape if not the anatomical body but the dress form as I am using shear thin fabrics. I find with the Paverpol sculpting the dress works out better then sculpting the  actual anatomy. 


Next step is to pour about 2 cups of Paverpol into the bag. Using a glove start pushing the fabric into the bag moving it around in the liquid and adding more of the fabric and more paverpol as needed until you get the entire piece coated.  Make sure to keep the rubber band at the top of the bag, as you will want to know where the center is later.  Don’t worry that you are wasting any Paverpol as most of this will be squeezed back off into the bag for later use when you are done. The bag will keep it fresh until the next project. Zip the bag and continue to manipulate it through the bag and let it sit in the bag for about an hour (Sealed) until the fabric is completely damp with it.  Then take the fabric out of the bag wringing it to remove excess Paverpol. Now go ahead and unhook the center point, pull it up onto the plastic and up onto the doll, use a piece of string to secure it around the waist of the doll and start laying the fabric out in the pattern you want. I did not want to skirt to hang straight down so I added a hoop skirt to hold the fabric out and away from the base. This hoop is held up by temporary wires and will be removed later. This next picture shows what you will see under the skirt once the paverpol dries.


I used upcycled lace from an old wedding dress and applies it onto the doll one small piece at a time after dry fitting for size and dipping in Paverpol. Then I did the same with the ribbon roses which I later coated in Paverpol also.


The doll is laying on her side or is upside down through this process depending on what area of the head I am working on. I glue on one small lock of hair one by one until the entire head is covered all flowing in the same direction. Last step is to coat the hair in paverpol while the doll is on its side and let it dry I used a fine tooth comb and a pint brush dipped in the Paverpol.


Skirt is dry and I will remove the under wire now by cutting the supporting strings. I do not want it to show through the skirt in sun light.


 I used small cups and the Luminarte Primary elements with water to make a wash to color the skirt and bring spring into the currently all winter fairy.  I hung the doll from the ceiling upside down and began adding drops of the water color mixture to the bottom of the fabric and allowing it, with the help of a few paper towels, to  run down the dress. Creating the illusion that it is actually flowing upward when she is turn right side up again. I added more color in some spots by just brushing it on. I changed the colors as I went around until the entire skirt had color. Her hair also had flowers and more paverpol added to it just before this step as you can see in the picture.

These are additional roses that I added to the lower part of the dress I hand colored them with the same Luminarte Water color mixture and again glued them in place and sealed them with    Paverpol.


Paverpol Crocheted Bowl

Hi everyone, Steph Ackerman here today with my newest Paverpol project. Paverpol is an amazing sculpting medium that hardens whatever it coats.  Today I'm working with yarn!


I love to crochet but find I mainly create hats, scarves and blankets because my students want quick projects that are easy to do and quick to finish.  Unless you are using thick yarn and the right sized stitches, crocheting a bowl can be tricky.  More often than not, you don't end up with a sturdy bowl.


However, add some Paverpol to your crocheted piece and voila!  Since Paverpol is a fabric hardener, I was able to turn my crocheted piece into a nice sturdy bowl, perfect for holding an assortment of supplies - in this case, fabric scraps.


I placed plastic wrap around a plastic bowl.  Plastic wrap makes it much easier to remove the finished project because it sticks to the plastic wrap, not the plastic bowl.  And is easy to remove once the project has hardened.

 
Next, I placed my crocheted piece into Paverpol being sure to completely soak it.  Then, I squeezed out the excess Paverpol before proceeding.


Next, I placed my crocheted piece on the plastic wrapped bowl, smoothing it out until it fit nicely around the bowl.   I left my crocheted piece on the bowl for 2-3 days.  I wanted to be sure it was completely hardened before I removed it.  Because of the plastic wrap, the bowl was easy to take off the bowl and the plastic wrap just peeled away.


And I love it.  The basket has hardened, is sturdy and retained it shape.  It's perfect for holding my fabric scraps so I can easily find them.


What do you think?  Wouldn't these make great gifts for the upcoming holidays?

Thanks for stopping by today.

Steph

Thursday, August 18, 2016

Flower Pot Fairy

Hi.
Welcome to another trial and error of Kim and Paverpol!


I have been trying to watch and read anything and everything
I can about creating with Paverpol products.
The problem is I am the type of person that no matter what
is watched or read; trial and error is still the best way I learn.
For this project I started with a normal every day pot...
 Then a container of flesh and bronze PP that I added...
TISSUE PAPER to...
I ended up with a pulpy mess, but not to be stopped by a bit of pulp...
I made it work...took awhile to spread it and make it stick.
I ended up adding some gray and bronze PP to the dried pot...
Wanting to make it look like a true pot I added mesh, black/gray
bits of gravel, a paper plate (I soaked with PP) and sand...
The gravel ends up on top of the mesh but the pictures did 
not take real well because it's real shiny.
I was real happy with the way the paper plate and sand turned out.
I wasn't sure if the sand would harden enough using transparent PP
but itdid. That sucker is hard as a glass plate!
Next I started my fairy.
Started with wire, aluminum foil, and masking tape.
Then added cut up t-shirt dipped in flesh and bronze PP...
 The clothes I used gray PP but added a few powders to end up with a
purplish color. Made a mess and had to go back over my little fairy
with the initial flesh and bronze combo.
The wings were an actual butterfly I had that I painted transparent PP on,
then poured red and gold glitter over both sides. 
Glued them on and added a few fabric flowers to her head...
Then added everything together and here is my Flower Pot Fairy...

Oh and I added some spanish moss that was soaked in PP.
Not exactly how I started out picturing it but some mistakes turn out
to be wonderful finished products!

Monday, August 15, 2016

Yoga Tree Pose

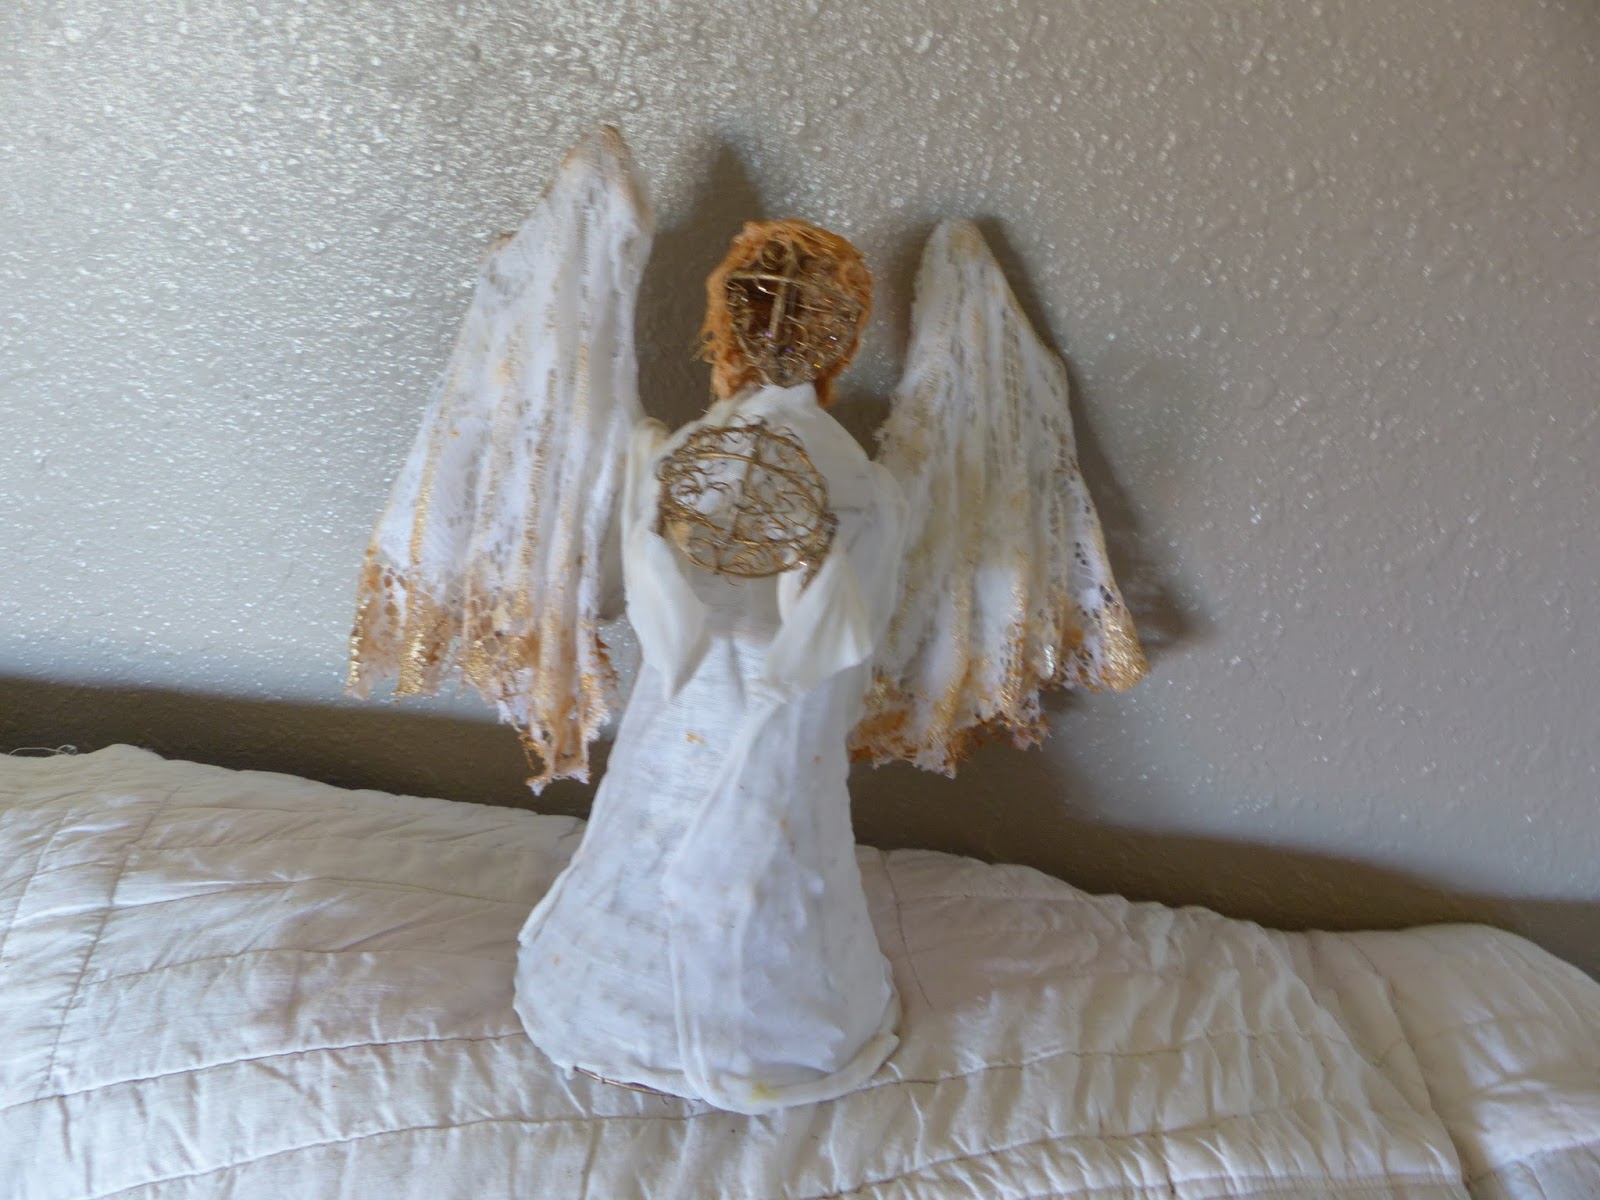
WOW! what a project…over 60 hours and I enjoyed every minute!

You can (talking to myself) research until you've memorized every tutorial on a product, but until you are up to your elbows in Paverpol, you won't figure out what works best for your particular project. I love scupture, so I wanted to do my own body. I decided to use Creative PaperClay since I hadn't used it before.

There is a full process video on my YouTube channel…it will be live in a few hours and I'll edit with the link here. Below are some step-out instructions.

STEP ONE:

Using a macrame ring and a circular piece of styrofoam, I made my base. When it broke into two halves, I ended up gluing and taping it to hold and left for a few days to cure.


STEP TWO:

The armature was a new one for me, too. It involved a left and right side, hand to foot. R and L mirror each other, with a bend for the shoulder, elbow, hip, knee and foot. Then a length of 16 gauge wire folded in half to form a head. The remaining wire wraps around the spine area of the left and right pieces. Viol å! A body! Now all I had to do was form the flesh and muscles.


STEP THREE:

Using aluminum foil and masking tape I started with the head. Remember to leave room for it getting bigger with the clay! I took my time with the features, learning how the clay worked for the result I wanted. Mine turned out a bit too big, but isn't that noticeable. Is it?


Now for the body. Foil and tape, then formed with clay. I modeled the position of the body as the clay setup. Working in stages, her waist developed a crack because I was not finished with the legs. I decided to anchor the foot to the opposite knee so it could stabilize.


After curing, I put a small piece of masking tape around the crack. Mixing some of the clay with water, I made a slurry. About the consistency of heavy cream, then I could brush on a thin layer to smooth out some of her lumps and bumps. After curing this time, I took to her with my Sand-It tools and dry sanded her.


STEP FOUR:

I brushed bronze Paverpol all over her body. I got a very smooth finish this way and was very pleased.


STEP FIVE:

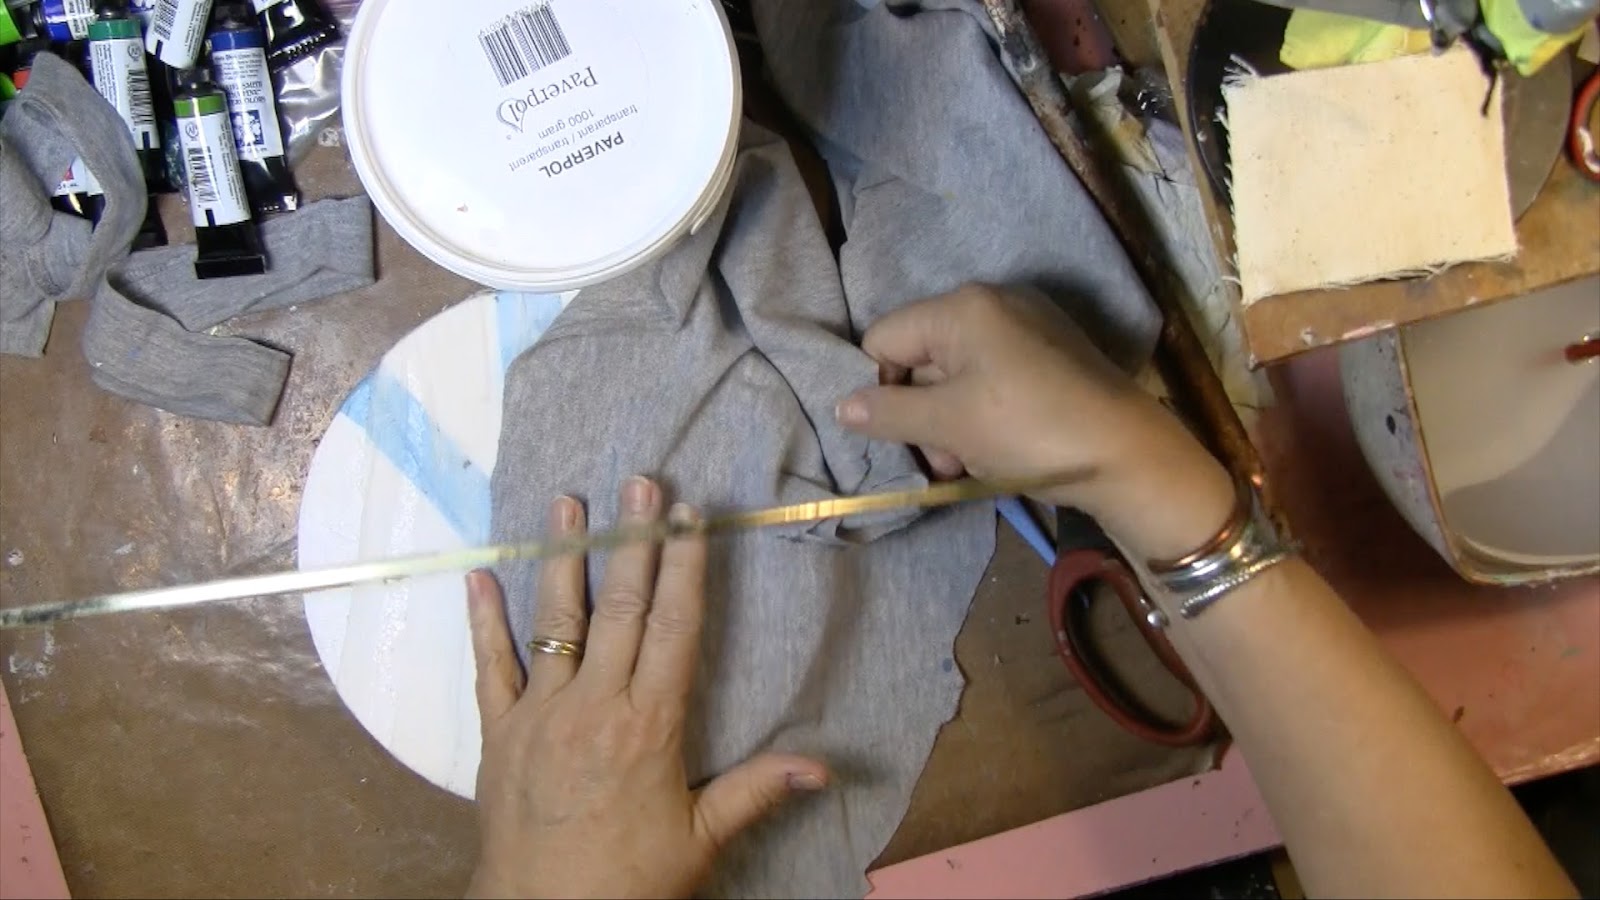
Back to the base. I started with muslin strips and transparent Paverpol. That became an exercise in futility, so after it cured, I took an old grey t-shirt and used the sleeves to cover the base with two pieces. Added bonus is that the grey cloth turned a granite color when cured.


STEP SIX:

I started with a piece of cotton shop towel (Sam's Club Scott brand "Rags"). These are heavy duty and have no embossed pattern. I wanted to make it look like Yoga clothes. Using the transparent Paverpol again, I tinted it with ColourArte Primary Elements. I painted her body, formed the cloth, then painted a coat on top of the cloth, encouraging wrinkles wherever I could.


For her top, I used a piece of leftover cloth that had been tinted with wipe ups. It had the same color, but in a more tie-dyed pattern. I formed her top the same way, and coated her on top with transparent Paverpol.

With a coral crochet thread, I made a rope to tie around her waiste, and brushed it with the transparent Paverpol. I then used a single thread to decorate her top.

STEP SEVEN:

I made a braid with the clay because I wanted her braid to be on the outside of her top. When it cured, I painted it with Bronze Paverpol to match her body.


STEP EIGHT:

Looking through my stash, I found a spool of smoky blue wired ribbon. It was twisted under her extended leg and through her arms. It will be coated with transparent Paverpol and will wrap around the brass ring. With the remaining blue Paverpol, I plan to put a stencil on the base and age it to look weathered. I want a few days to resolve these last details.


No point in rushing her now!

xxoo
Vicki
all my social media links are at www.VickiRossArt.com. I welcome comments and lurkers!